With the first Android P Developer Preview’s release since the last week. Well, the wait has finally come to an end as Google has today announced Android Q Beta 1 (yes, not the Developer Preview) for the entire Pixel lineup.
The Android Q Beta 1 might not look too different from Android 9 Pie on the surface, but there are noticeable changes across the board, especially under the hood. I know there’s interest from Android enthusiasts to flash the latest flavour of Android and check out all its new features, so here’s a guide on how to install Android Q Beta 1 on Pixel Devices:
Note: We’ve installed Android Q Beta 1 on our Pixel 2 XL and Pixel 3 XL using a Windows laptop, but the process would be almost identical for other devices or platforms.
List of Devices Supported
We expected Google to make the first beta for Android Q accessible solely to second and third-generation Pixel owners, however, it amazed everyone by extending support for the first-gen devices on popular demand. So, here’s a look at devices that support Android Q Beta 1 right now:
- Pixel 3 XL
- Pixel 3
- Pixel 2 XL
- Pixel 2
- Pixel XL
- Pixel
The rumor mill also had us hoping that the Android Q Beta 1 will become available for a number of OEM partner devices, however, that isn’t the case with this build. We can expect that announcement at Google I/O 2019, where Google will officially announce Android Q and releases a new beta build.
OTA Update via Android Q Beta Program
Since this isn’t an alpha build, which we had been eagerly looking forward to, Google has opened the Android Q Beta Program to enable anyone interested to easily check out new features and improvements in the latest Android version.
This is possibly the most simple and sure-shot method to upgrade a Pixel device and test drive Android Q Beta 1. You will continue to receive future Android Q beta builds without having to worry about flashing or sideloading via this method, so here are the steps you need to follow to join the beta program.
Note: This method also ensures that your data isn’t wiped away but we still suggest you make a backup so that you can recover your data if something goes south.
1. Visit the Android Beta website via this link and head to the “Devices” tab to see a list of all your eligible devices (we’ve got the Pixel 2 XL and Pixel 3XL listed below).
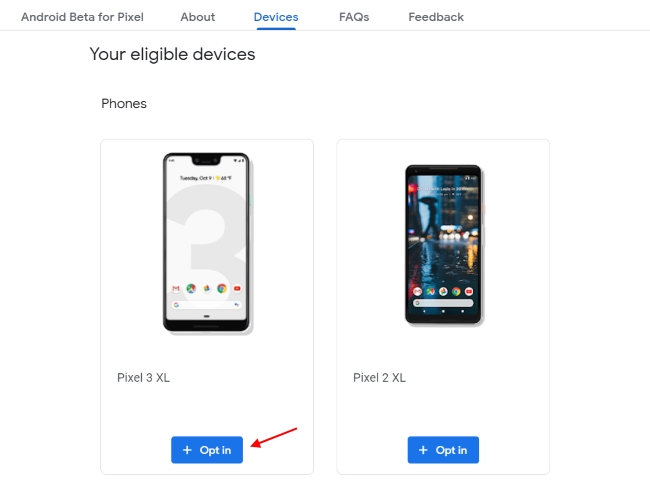
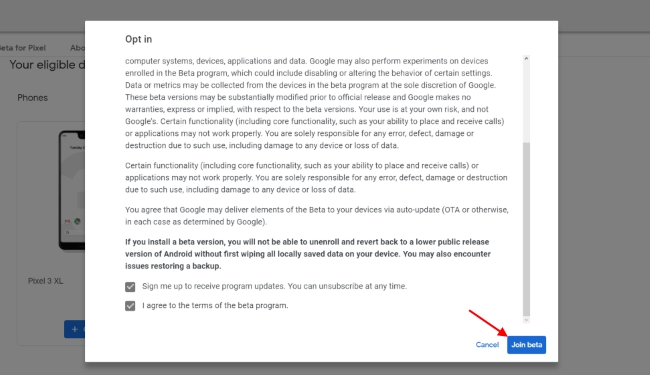
2. Click the ‘Opt in’ button under the device name on which you plan to install the Android Q Beta 1 build. Agree to the terms and conditions that pop up and hit the ‘Join Beta’ button to let Google know you’re in.
3. Move to your Pixel device next. Head to “Settings -> System -> Advanced -> System Update” and check if any updates are available to see Android Q Beta 1 start installing.
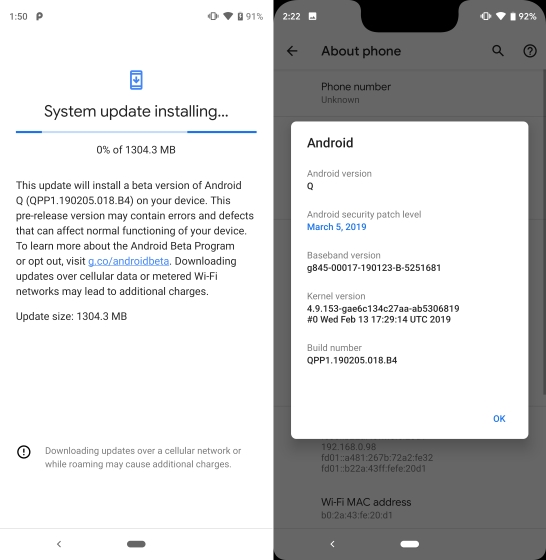
4. Your device will restart to complete the installation process and voila, you’re now on Android Q (well, a buggy beta build for starters).
Flash Android Q Beta 1 via Bootloader Unlock Method
If you don’t mind losing your data and want to do a fresh install for the latest version of Android, well, then you need to undertake the tedious task of flashing Android Q Beta 1 onto your Pixel device. Before you jump in head first into the installation process, you’ll need to get a few things in order:
Android Q System Image
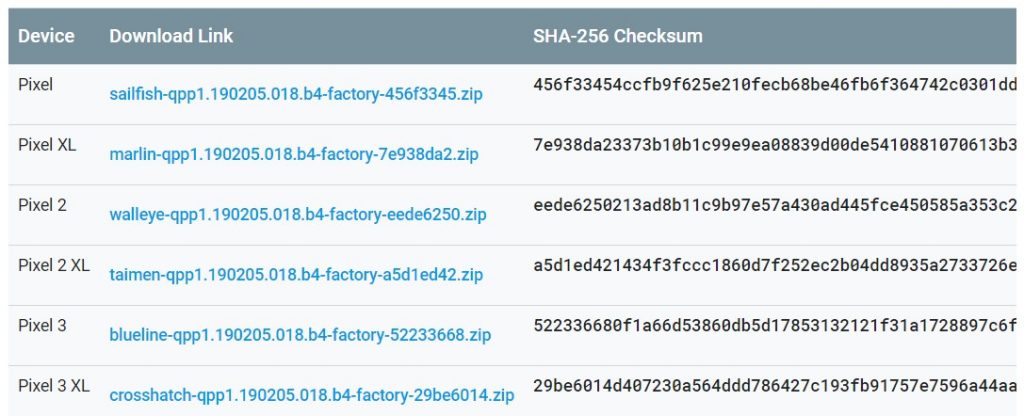
First and foremost, you’ll need to download the Android Q Beta 1 system image for your Pixel device from this link. The list would look like the screenshot below, just click on the download link next to your device’s name.
ADB and Fastboot Tools
The flashing process requires you to have ADB and Fastboot tools installed on your Windows PC or Mac. You can download ADB and Fastboot tools right here. You can also check out our detailed guide on how to install these tools, if you face issues during the process.
Developer Options
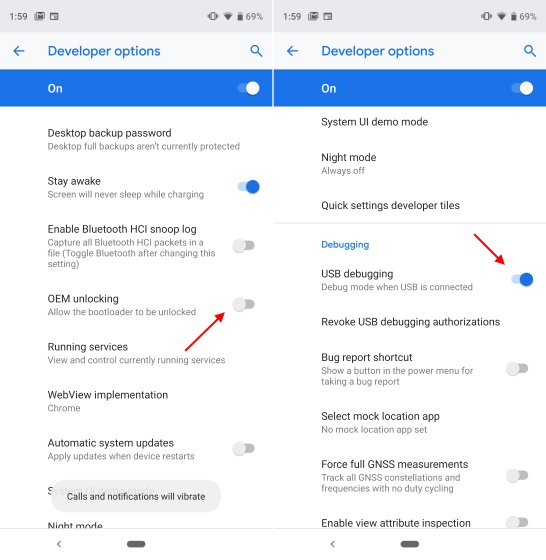
Also, you will need to enable a couple of developer options, i.e OEM Unlocking and USB Debugging, by heading to ‘Settings > System > Developer Options’ menu on your Pie-based device (which should be running the latest security patch).
Unlock the Bootloader
As should be very evident, installing Android Q Beta 1 first requires you to unlock the bootloader on your smartphone. Do this by following the steps underneath:
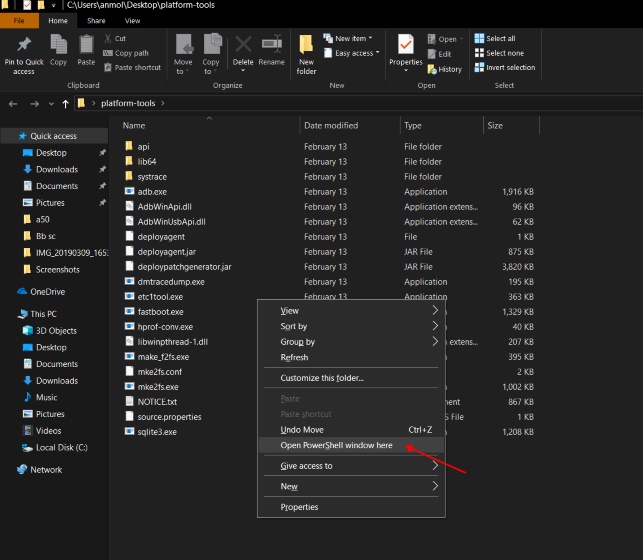
1. Connect your Pixel to your PC or Mac. Head to the destination where you’ve installed ADB and Fastboot, followed byopening a Command window (hold the Shift key and right-click to see the option) on Windows and the Terminal on Mac.
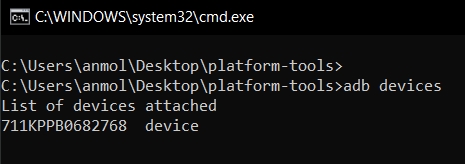
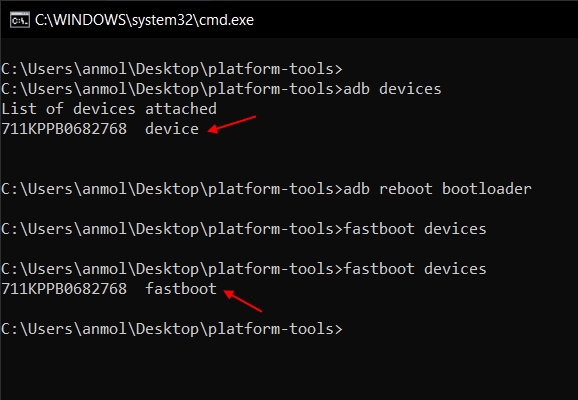
2. Now, enter the command ‘adb devices’ to see if your device is connected or not.
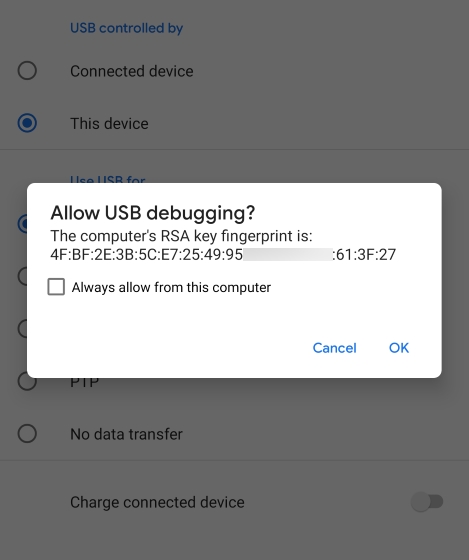
Note: Your Pixel will display a prompt asking you to ‘Allow USB debugging,’ to which you simply tap OK to grant the permission.
3. Now you need to reboot your smartphone into bootloader mode. Enter the following command to do so:
adb reboot bootloader
4. Once your device starts in bootloader mode, input the following command to make sure fastboot recognizes it. The output should look similar to what we saw with adb devices.
fastboot devices
5. Finally, enter one of the following commands, depending on your smartphone, to unlock the bootloader. You should see a few prompts on your device, just accept it and the device will be completely wiped and bootloader unlocked.
Pixel or Pixel XL: fastboot oem unlockPixel 2/2XL or Pixel 3/3XL: fastboot flashing unlockPixel 2 XL: fastboot flashing unlock_critical (with loader version prior to TMZ20a)
Installing Android Q Beta 1
After unlocking the bootloader, you first need to extract the Android Q beta 1 system image we had downloaded earlier. Then, follow the steps underneath:
Note: You need to be running build PQ2A.190305.002 (March security patch on Android Pie) build for the OTAs to work.
1. In the extracted folder, you will find another .ZIP file (this one’s the actual image) and need to extract that as well. Move all of these files to the adb and fastboot platform tools folder.

2. Now connect your Pixel device to your PC or Mac, reboot it into bootloader mode, and launch the “flash-all.bat” file. This will open up a command prompt window and flash the Android Q Beta 1 image to your Pixel.
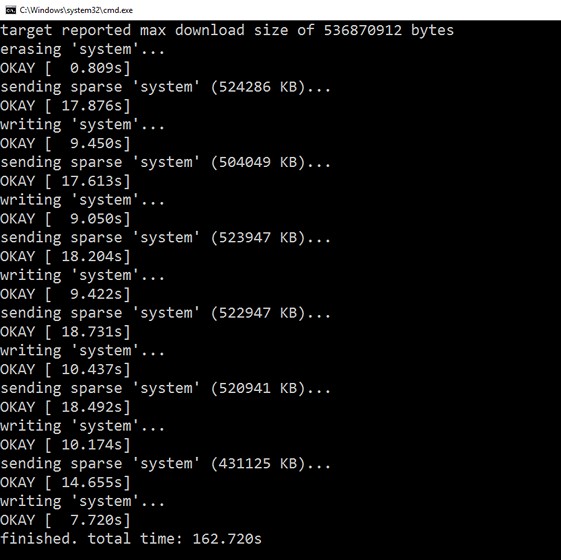
3. If you encounter any errors in the former step, you can go ahead and flash all the files individually using the commands listed below:
fastboot flash bootloader <bootloader file name here>.imgfastboot reboot-bootloaderfastboot reboot-bootloaderfastboot flash radio <radio file name here>.imgfastboot rebootfastboot flash -w update <image file name here>.zip
4. Once the scripts finish running, your device will reboot and Android Q Beta 1 should be installed on it.
Updating to Android Q Beta 1 via ADB Sideload
If you’re not comfortable with unlocking the bootloader and going through a boatload of steps to get the latest flavor of Android on your device, then you can sideload the OTA update file of the Android Q dev preview via ADB. This method isn’t just simple but also preserves all of your existing data, so we suggest it over the bootloader unlock method.
Here are the steps to update your Pixel to Android Q Beta 1 using the ADB Sideload method:
1. First, you need to download the OTA .ZIP file for your Pixel device, for which you can head to this link.
2. Connect your device to your PC or Mac, reboot to the bootloader and use the volume down key to scroll to ‘recovery’ and select it by pressing the power button. Then, you need to press down on the volume up and power button simultaneously and select the “apply update from ADB” option.
3. Once you’ve done that, you need to run the following command from your PC to begin the installation process.
adb sideload <filename of update.zip>
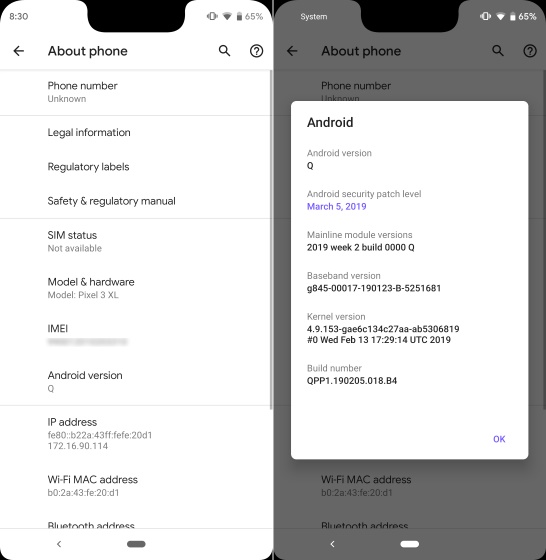
Experience the Goodness of Android Q on Your Pixel
This is the first official Android Q release, meaning the latest version of Android is still in pretty early stages of development. We wouldn’t suggest you to install the same on your primary device. So, pull out your old Pixel from the attic (even your first-gen Pixel works) instead and see what the next flavour of Android feels like.
Comments
Post a Comment
Please give some suggestions or share your experience here...